Learn how to erect complicated roof systems with rafters. This guide includes step by step approaches, and state of the art calculators for every scenario.
Rafter Raising
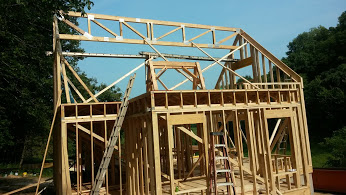
The first step is to take a direct measurement of the span. This is typically the distance from the outside of the wall to the outside of the wall. Complicated roof systems can have spans that are very difficult to determine and should only be attempted by experienced professionals. Be sure that the span is the same on both ends, the bearing walls are straight, and are properly braced. If there is a ceiling, then it should be complete according to these specifications with all lateral braces nailed down properly. Scatter sheets of decking all over the joists for safer working conditions.
Use one of these rafter calculators to determine the rise, the run, the length of the rafter, and the height of the scaffold. Use the dimensions determined by the calculator to lay out a rafter pattern. Use the pattern to mark out three rafters and saw them. Prepare a ridge board and then set up a safe scaffold.
Stand two rafters on one end. Place a temporary 2 x 4 block in between the rafters. Pay special attention the the fit of the cuts. If there is a problem, then find it now. The block should the same length as the ridge board is wide. Nail on a 2 x 4 like collar tie right below the temporary block. Brace the rafters from the top down and plumb the gable. Take a measurement for a temporary prop to go from the bottom of the ridge to the top of a block across the ceiling joists. Be sure to have enough hands available for hanging the ridge.
Remove the block from between the rafters and slide in the ridge board from the top. Nail the ridge to the rafters and set the other end on the temporary prop. Do not forget to hold on to it until the third rafter is attached to the end of the ridge board. It should be breaking half way on the ridge. The skeleton is now stable.
Hip roofs require a slightly different approach than gable roofs. Use the run determined by the hip roof rafter calculator to mark the center rafter on the short side. On both long walls, mark for the end common rafter by measuring from the short wall and marking the run (sets ahead). Do this on all four corners if applicable. The rest of the rafters towards the corners will be jack rafters towards the corners and the common rafters will be in between the marks.
From the center rafter on each end, lay for whatever center being used. Do the same back to each corner off each common mark. The common rafter layout does not matter which end stays right; the lay out will change regardless. Start with the common rafters on one end when starting the skeleton.
Massive Ridge Beams
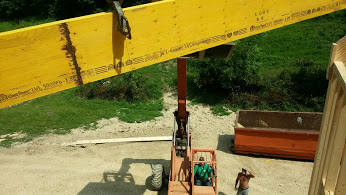
Applications requiring massive ridge beams such as the 40′ monster below should only be attempted with the aid of a boom truck. The beams are far too heavy to handle by hand. A 2 x 12 x 24′ is about the maximum that two experienced framing carpenters can handle by man handling it.


