Learn how to replace a wall with a micro laminated beam with these easy to follow DIY instructions. Build temporary walls to support the load above.
Wall Demolition Safety
Before any sledge hammers are drawn, it is important to know what the wall supports and what wires or pipes will have to be dealt with. Realize that paint, insulation, and other building materials will create dust when removing them. Use a dust removal blower along with a breathing filter to keep your lungs clear. Completely remove the drywall or other wall covering exposing the studs and other framing members. Remove any wires or pipes.
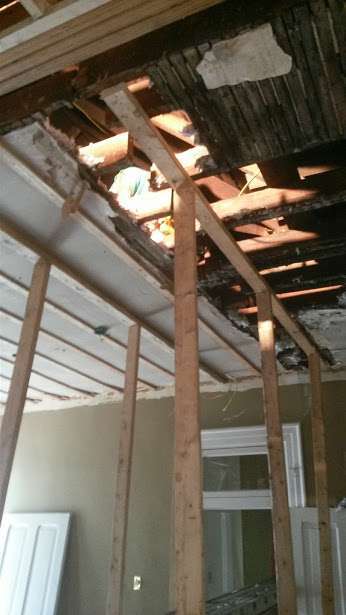
Whatever the load, it must be properly supported. If the wall bears more than ceiling joists alone, then take extra precaution in shoring up the load. A fail here could be as bad as a cave-in deep inside of a mine tunnel. The best way to prevent this is with temporary walls. Leave enough room in between the walls to work. Use a reciprocating saw with a bi-metal blade to surgically remove the studs and wall plates. Take care not to harm the ceiling joists.
Installing the Beam
The new beam needs a proper post under each each to transfer the vertical load from above to below. Typically this is only a matter of adding double studs inside each wall directly below where the beam sits. If the beam will be dropped for the joist to sit on top, then use TABLE R502.5(1) of the IRC to find the appropriate number of jack studs and right sizing of the beam. If there are any concerns, then a good rule of thumb is to use double jack studs for any span over 4′ and let your lumber supplier engineer the beam.
This load transfer does not end at the bottom of the wall. It must continue on to the ground. Not all walls have enough beef under them to carry the additional load of a beam. If the bearing walls have double joists beneath them, then make them triples. If the walls are on top of girders, then they are fine. If there is nothing directly below the walls, then pour footings and build piers on top of them (use 6 x 6 treated pine).
Drop beams are much easier at this stage than flush beams. In order to fit a flush beam between the ceiling, they must be sawed. Do this by chalking lines along the bottom of the joists exactly where the beam goes. Add 1/8″ to make it easier to get it in. Use a torpedo level to make a plumb mark on each joist. Saw the joists. Test the gap and make any necessary adjustments until you are satisfied.
Laminated beams have a sufficient amount of weight to deal with. Use this calculator to find out how much it does weigh. Be sure to have plenty of extra lifting power and a safe scaffold before you try to position the beam into place.
Once the beam reaches its final destination, permanently fasten down each end. Use a jack and a post if necessary to make each joist flush and attach it with an approved joist hanger. Once all of the joists are nailed in, then slowly and carefully remove the temporary walls.
Enjoy the open space you have created by replacing a wall with a laminated beam.