Use this simple lay out technique to accurately space the 1 1/2″ spindles on handrails on a deck. The building code states that a 4″ sphere cannot pass through at any point.
A common mistake when installing spindles is to use a 2 x 4 block to gauge the space between the spindles at the top and the bottom. Even the most careful of carpenters run into variations when using this technique, no matter what.
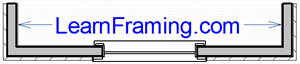
Use a 5″ Lay Out for Spindles
Its simple, just use a 5″ lay out. Once the girt (the board the spindles will nail to) has been established for the top and the bottom, hook a tape measure and pull a 5″ lay out down the length of the board. In other words, mark, 5″, 10″, 15″, 20″, 25″ and so on down the length of the girt on the top. Then repeat the exact procedure for the bottom. Mark sure and use a tiny mark only right on the edge of the side where the spindle goes.
Even though most pre-cut spindles are less than 1 1/2″, the smallest are still only about 1 1/4″. When this is subtracted from 5″, it still leaves 3 3/4″ for the space. This is below the 4″ maximum for spindle spacing.
Once there are lay out marks, installation is a snap. If you are use screws, then go ahead and start the screws at the top and bottom of each spindle at a precise position. Don’t try and eyeball this, it just look too shitty to have a wavy line of screw heads.
I personally prefer to start all of the screws first on good work table. Then I like to place the spindle for an assistant who is on his knees on the platform of the deck leaning to screw the bottom first on every spindle. Then its a simple matter of him standing up and leaning over to screw the tops. This is a very fast, accurate and easy method for laying out and fastening the spindles on a deck railing.
